 |
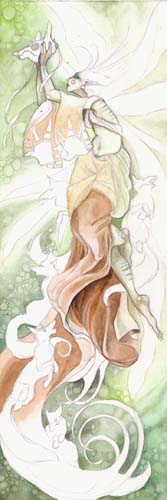 |
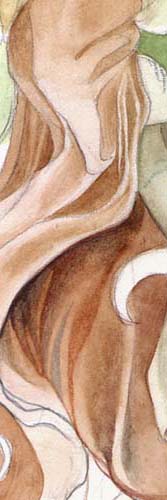
Step 7 - The clothing
With the mid sized brushes, I continue working on the draped clothing.
I use various mixtures of cadmium red, naples yellow, and light red to intensify the color. Then for the shadows, I use vandyke brown, light red, and burnt umber.
Again, this is all done with many layers, and waiting for the layers to dry in between. This is watercolor, so the drying time is very quick, especially with such a small area.
In between layers of adding more depth to the shadows, I put in glazes of cadmium red and light red to bring out the brightness of the color.
|
 |
 |
Step 8 - More clothing
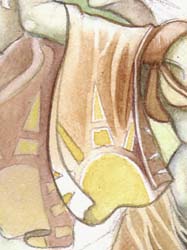
Still adding layers of reds to the clothing.
To finish up the part around her waist, I add shadows as described above, and also some light washes of sap green and yellows on the right side. This is because the wings will be glowing greenish-yellow, and I want some of that color reflected in the highlights along her hip.
Also, I finish up the patterns on the sleeves with lemon and naples yellow. Notice that I left a thin outline of white paper showing through, instead of painting all the way to the borders.
|
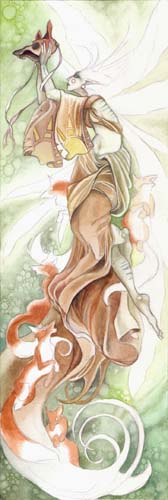 |
Step 9 - Starting the foxes
At last, the foxes!
With a much thicker layer of light red and cadmium red then I used on her dress, I paint an underlayer for the foxes. I wanted to make them really bright colored. I leave a little bit of white around the edges of them for the highlights and reflected light.
I also finish up the mask that she is holding up. Also with more cadmium red, light red, yellow ochre for the base colors. The shadows are done with burnt umber and paynes grey and a little bit of black at the nose.
You'll notice, I used black nowhere else. I only use it for very rare touches. Black itself is a very dead color, and most of the time a much better effect can be achieved by using a mixture of burnt umber and ultramarine blue, or paynes grey. Those mixtures just make a painting much more lively.
|
<-- Previous Page Next Page-->

|


