|
Tools and starting out
The tools I use are:
- a Sanford Turquoise Lead Holder with 2B lead
- .5 mechanical pencil with 2B lead
- .3 mechanical pencil with HB lead (anything softer breaks too easily)
- a rubber eraser
- a Sakura mechanical eraser
- tissue paper for smearing
- Canson bristol board. The size for this particular piece was 7x11 inches.
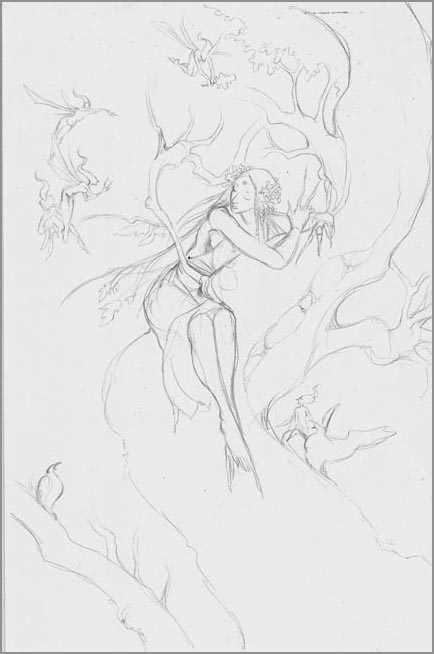
I start with a sketch, drawing with the .5 mechanical pencil on the bristol board.
You can click on any of the images to view a slightly larger version.
|
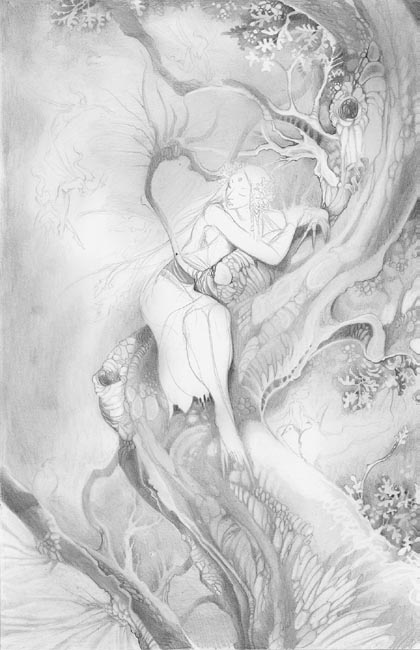
Step 1
Using the lead holder, I fill in some rough tones for the background. I don't concentrate on keeping this very smooth at this stage. In fact, I prefer some irregularities as will be shown later.
|
|
 |
 |
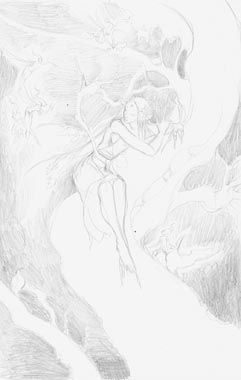
Step 2
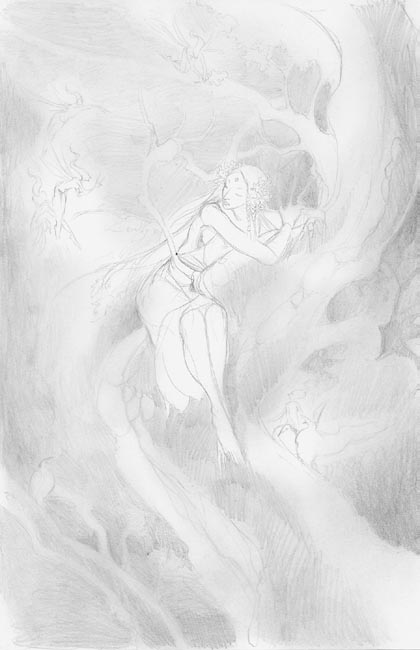
With a piece of tissue paper, I smear the lead all over the picture. It's fine if it blurs all the drawn lines of the initial sketch, because this softens the whole drawing out. This makes the image look very fuzzy and out of focus, which is the intent for the distant background elements.
This also gives an undercoat of grey to work with, which will give a base from which to pull the whites out and deepen the blacks later on.
|
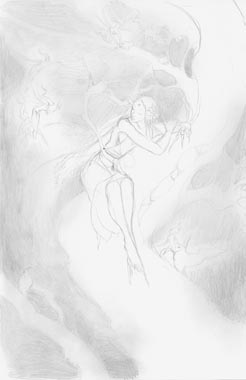
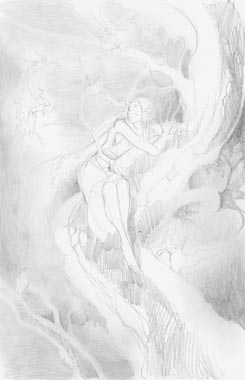
Step 3
Just like in step 1, I further fill in some of the values in the foreground elements, and darken the background as well, adding more texture to it. I want to keep the background elements very soft so that they receed from the foreground, and don't attract too much attention.
|
|
 |
 |
Step 4
Again, I blur everything with tissue paper.
|
Step 5
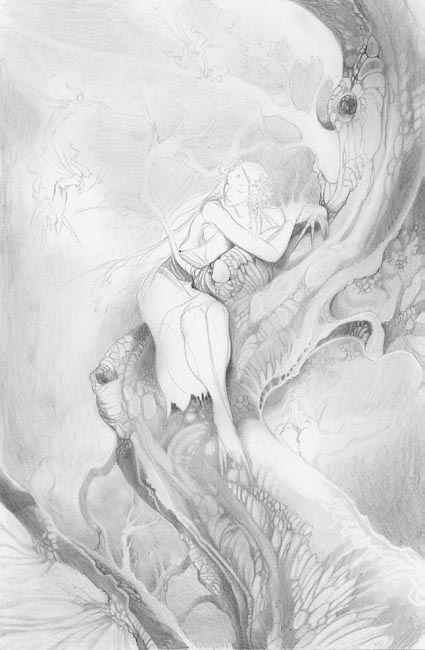
Now I finally start to fill in a bit of detail.
I start with the tree trunk. The tissue paper does not completely smear everything into oblivion, so there are little irregularities of texture already. I start to enhance these by darkening the lines to make tree bark.
I lightly swipe some places with tissue to keep things soft.
|
|
 |
 |
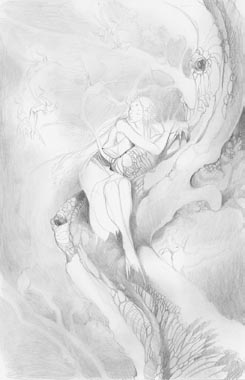
Step 6
Now that there is enough tone covering most of the page, I can start erasing to bring out highlights. Using the electric eraser (which you can sharpen to a point and thus get more control with), I trace the edges of the tree, and spot the textured bark.
|
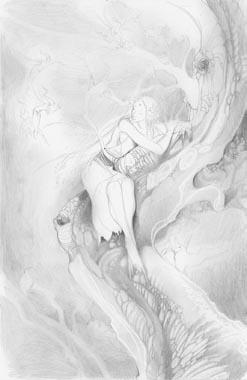
Step 7
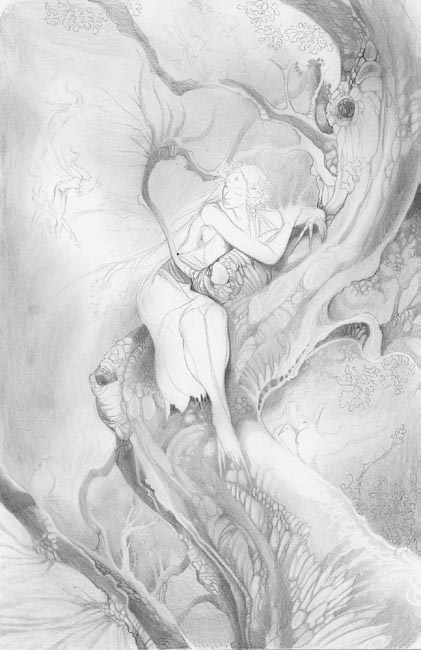
At this point, I stop using the lead holder and switch to the .5 and .3 pencils for finer control.
I continue filling in the darkest areas, like under the dryad's skirt, where her weight is resting, and in the more distant tree branches.
In this way, I'm pulling the highlights forward (with the eraser), and pushing the shadows back. Keeping the darker areas blurred helps with the sense of depth.
The branch in the lower right basically gets the same treatment I've given to the main trunk so far.
|
|
 |
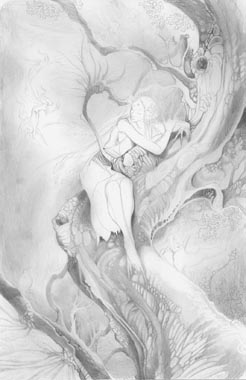 |
Step 8
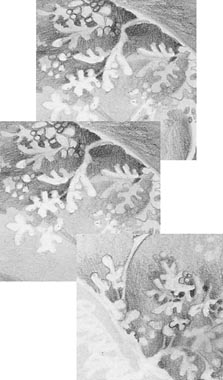
I fill in the darker shadowed branches around the dryad. As they bend and wind into the distance, I let the tone fade into the background grey. I darken the greys around the left side near the fairies as well because I want a nice contrasting grey from which to pick the white of their shimmering wings out of. Without the contrast, they will not seem to glow. Then I start to outline the oak leaves that poke in on the edges to the right and top. I pencil these in lightly with the .3 pencil to keep the lines fine. I don't want them to to be too dark, because then they will just be outlined and not look like 3d objects. The close-up image on the right shows you the leaves.
|
|
 |
 |
Step 9
Using the .3 pencil, I darken the gaps between the leaves with shadows, and erase the actual leaves themselves with the mechanical eraser so that they emerge from the grey.
|
|
 |
 |
Step 10
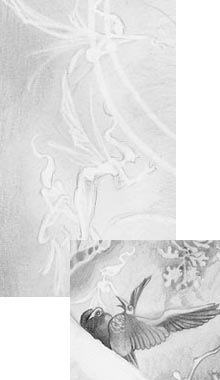
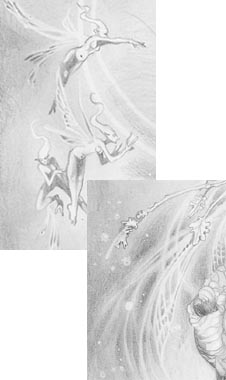
With the mechanical eraser, I erase all the highlights in the little fairies. I also erase some streaks for the dryads wings and highlights in her hair. I also fill in and do the details for the birds.
|
|
 |
 |
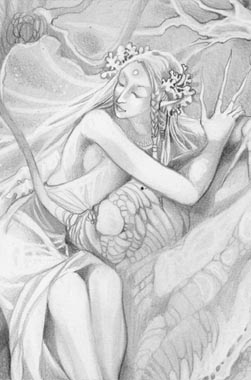
Step 11
I shade in the areas between the highlights of the dryad's wings, and add little sparklies with the electric eraser. I also finish the little fairies by doing the shadows on their bodies.
|
|
 |
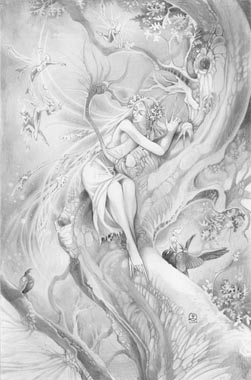 |
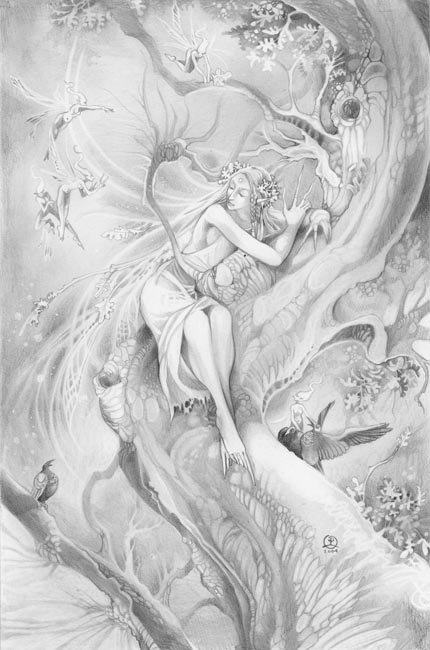
Step 12
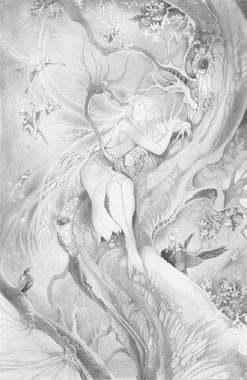
Finish up the dryad herself.
|
|
 |